
Here’s a step-by-step guide to help you submit an on-chain withdrawal request. For withdrawal via internal transfer, you can refer to here.
Notes:
— Email and Google Authentication are required before you can proceed to submit an on-chain withdrawal request.
— Bybit TR supports withdrawals for coins listed on the Funding Assets page with an available Withdrawal button.
— As part of Travel Rule measures, users will need to complete the wallet address verification on the crypto deposit. Read more in the FAQ — Travel Rule.
— Bybit TR supports immediate withdrawal. The confirmation time depends on the blockchain and its current network traffic. However, please note that a cooling period will be applied to withdrawals of crypto assets sent to unhosted wallets or foreign-based crypto service providers that are not subject to the Travel Rule. For more information, please refer to Introduction to the Crypto Withdrawal Cooling Period.
— For the withdrawal of coins that require a tag/memo (e.g. XRP/A/XYM/XLM/XEM), please remember to enter your Tag or Memo for the transfer. Failure to do so will cause unnecessary delays in processing your withdrawal.
— As part of Travel Rule measures, some users will need to complete the wallet address verification on the crypto withdrawal. Read more in the FAQ — Travel Rule.
Step 1: Go to Assets at the top right-hand corner of the Bybit TR home page and click on Withdraw.
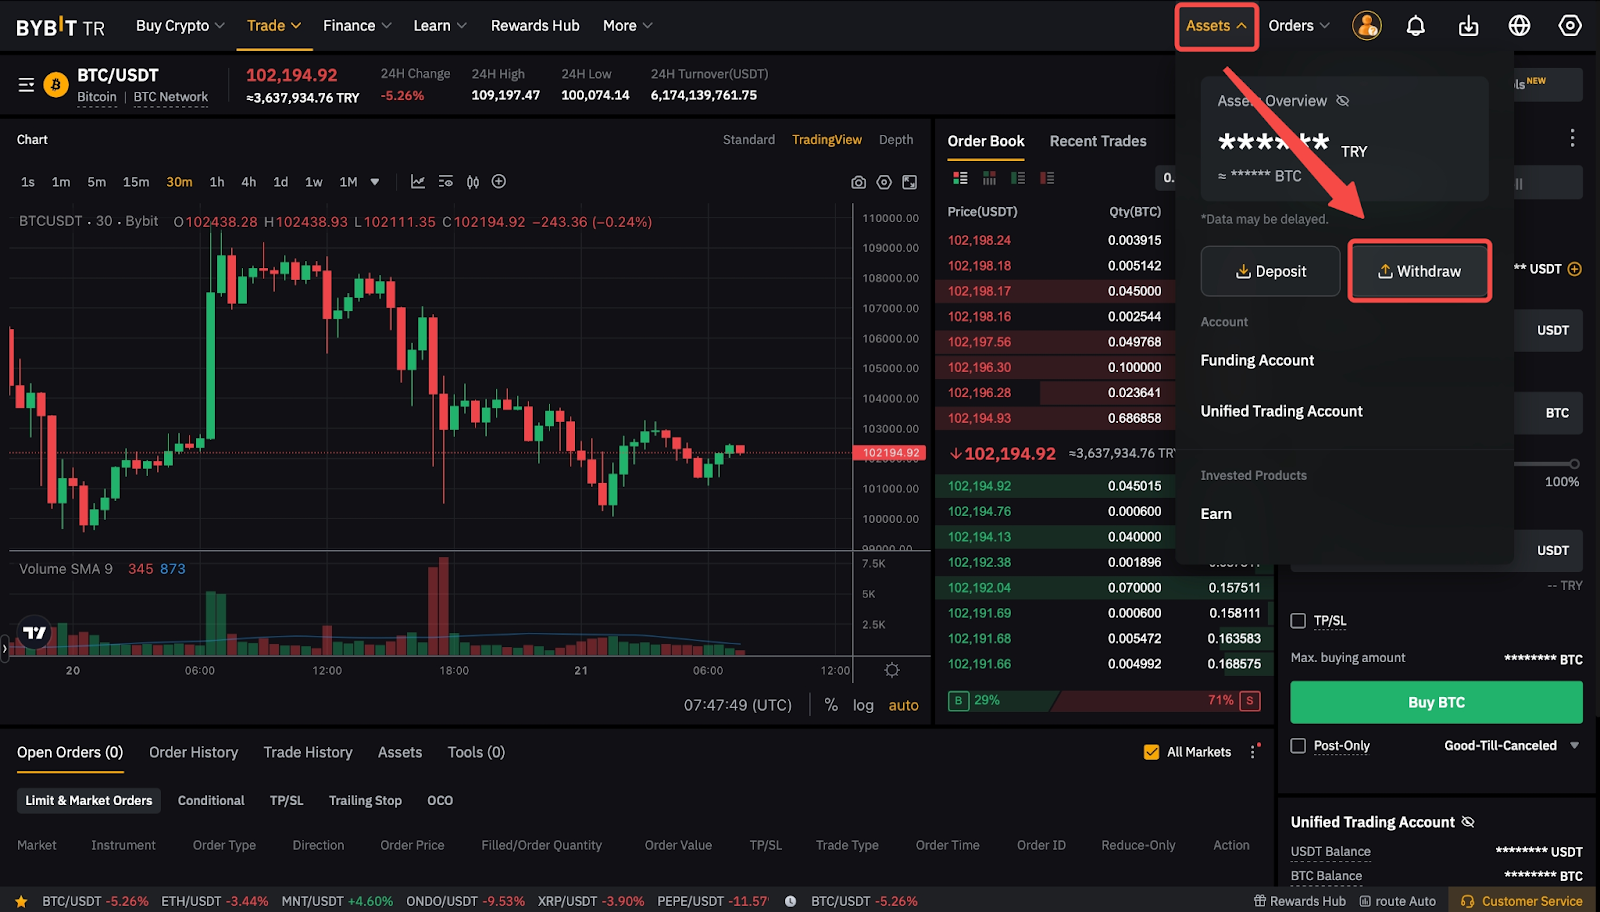
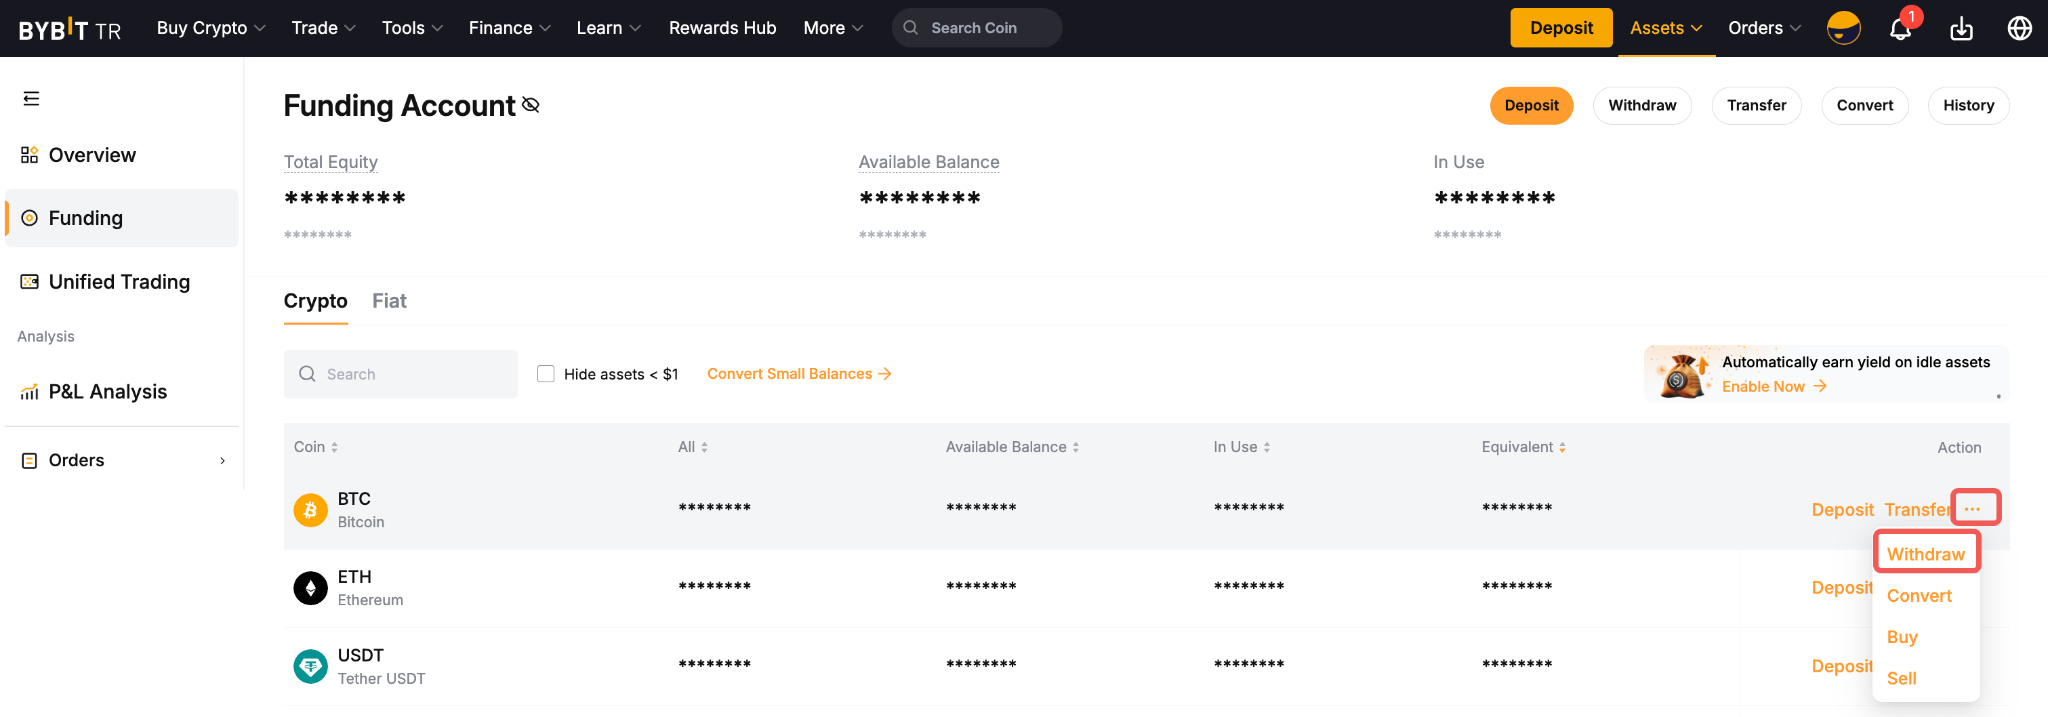
Alternatively, head to your Funding Account page and click on the Withdraw button in the column of the withdrawable coin you prefer.
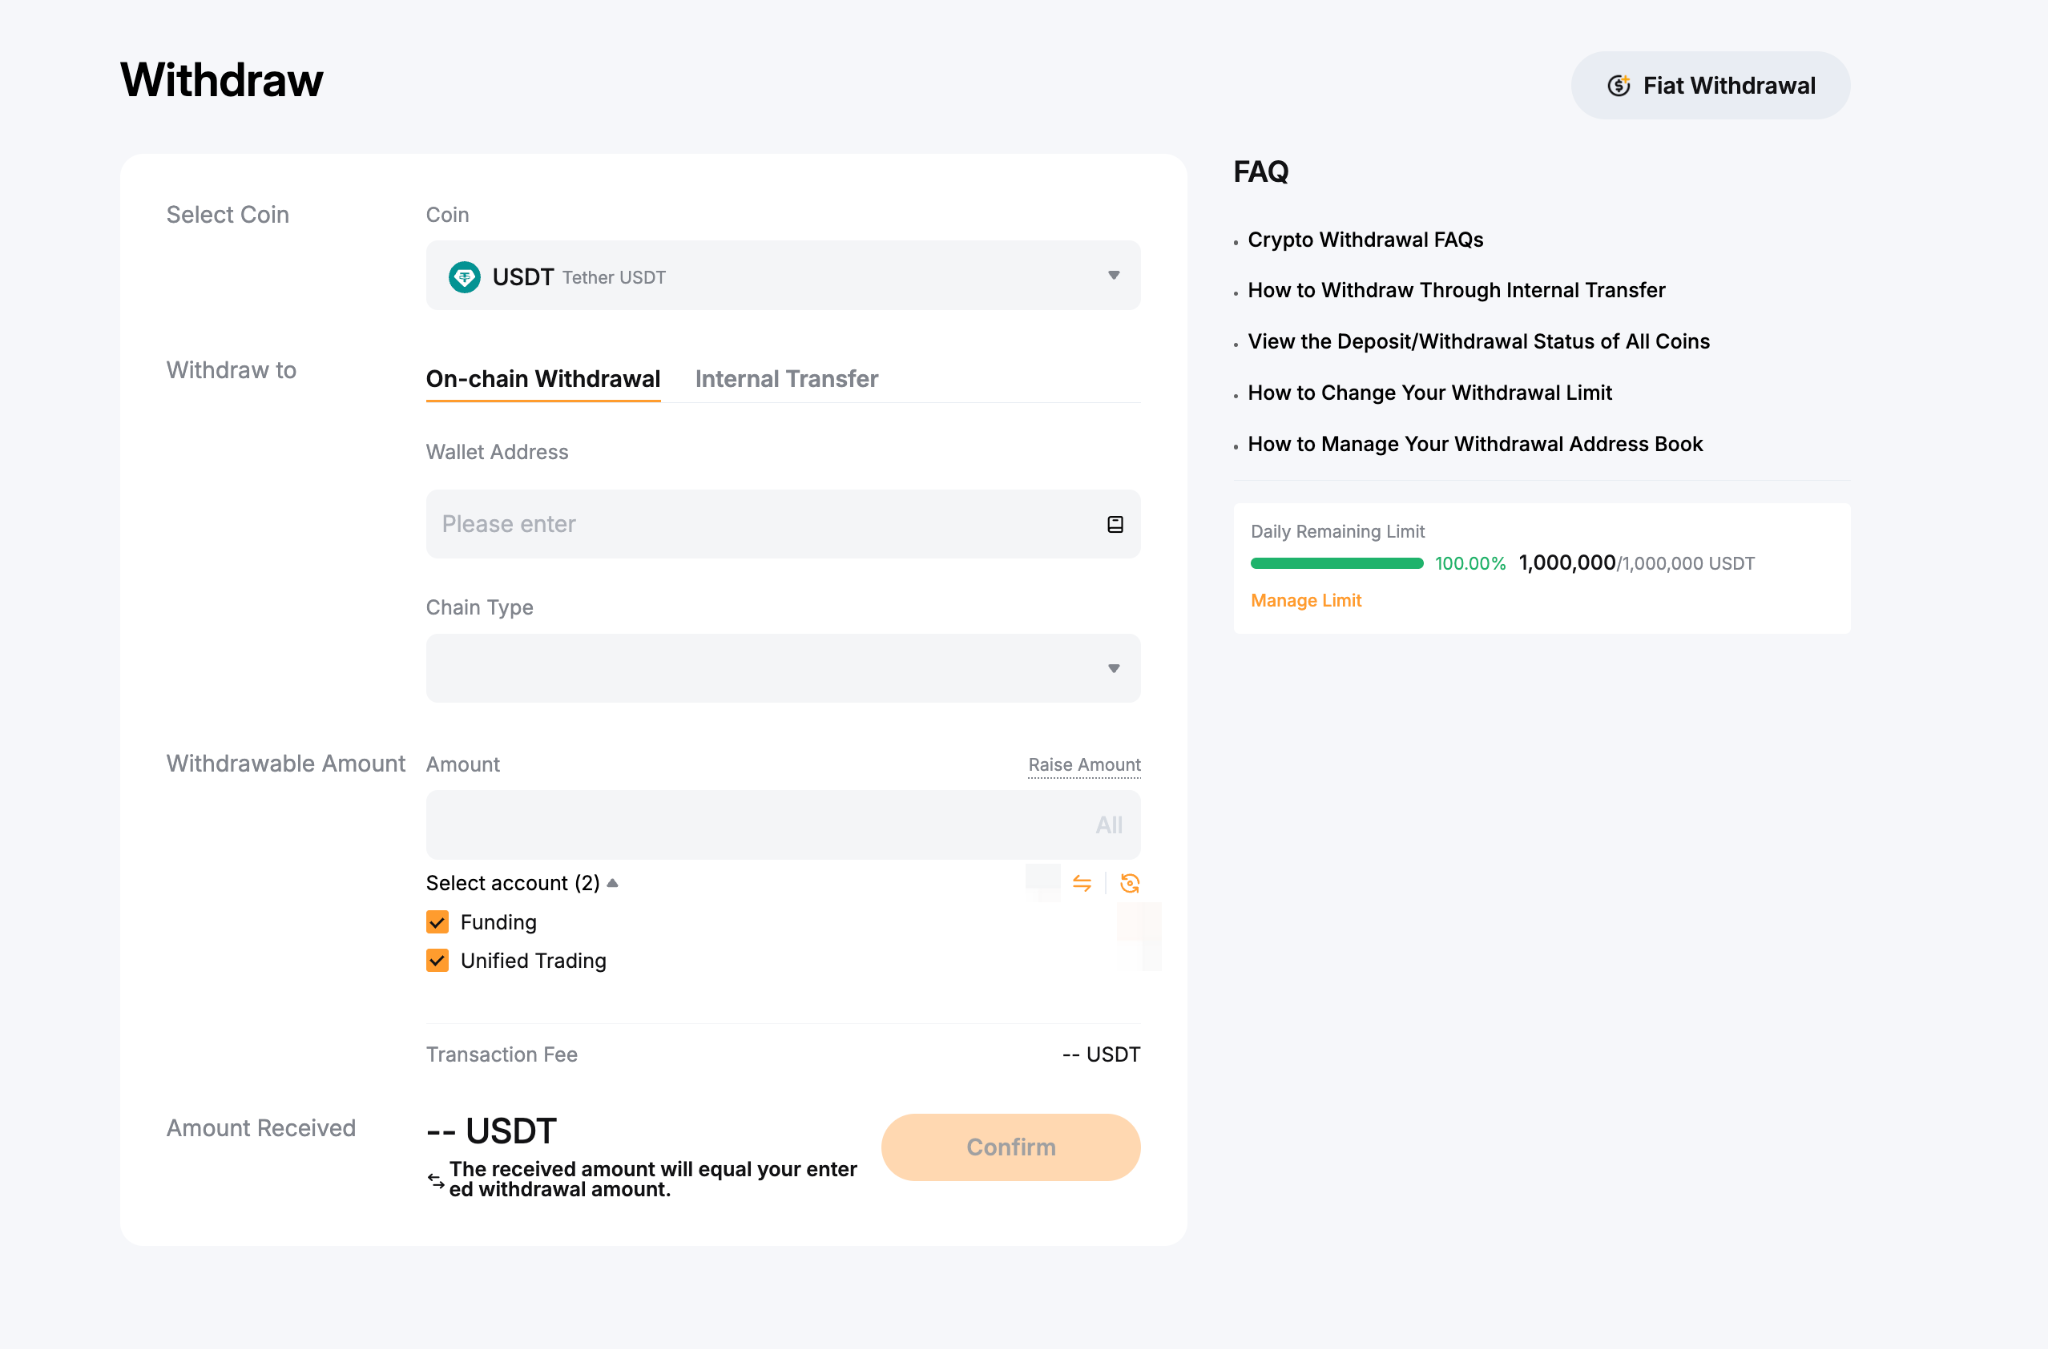
Step 2: Select the coin to withdraw (if it has not been preselected) as well as the withdrawal wallet address. Then, you can either:
- Enter the wallet address directly in the Wallet Address field, or
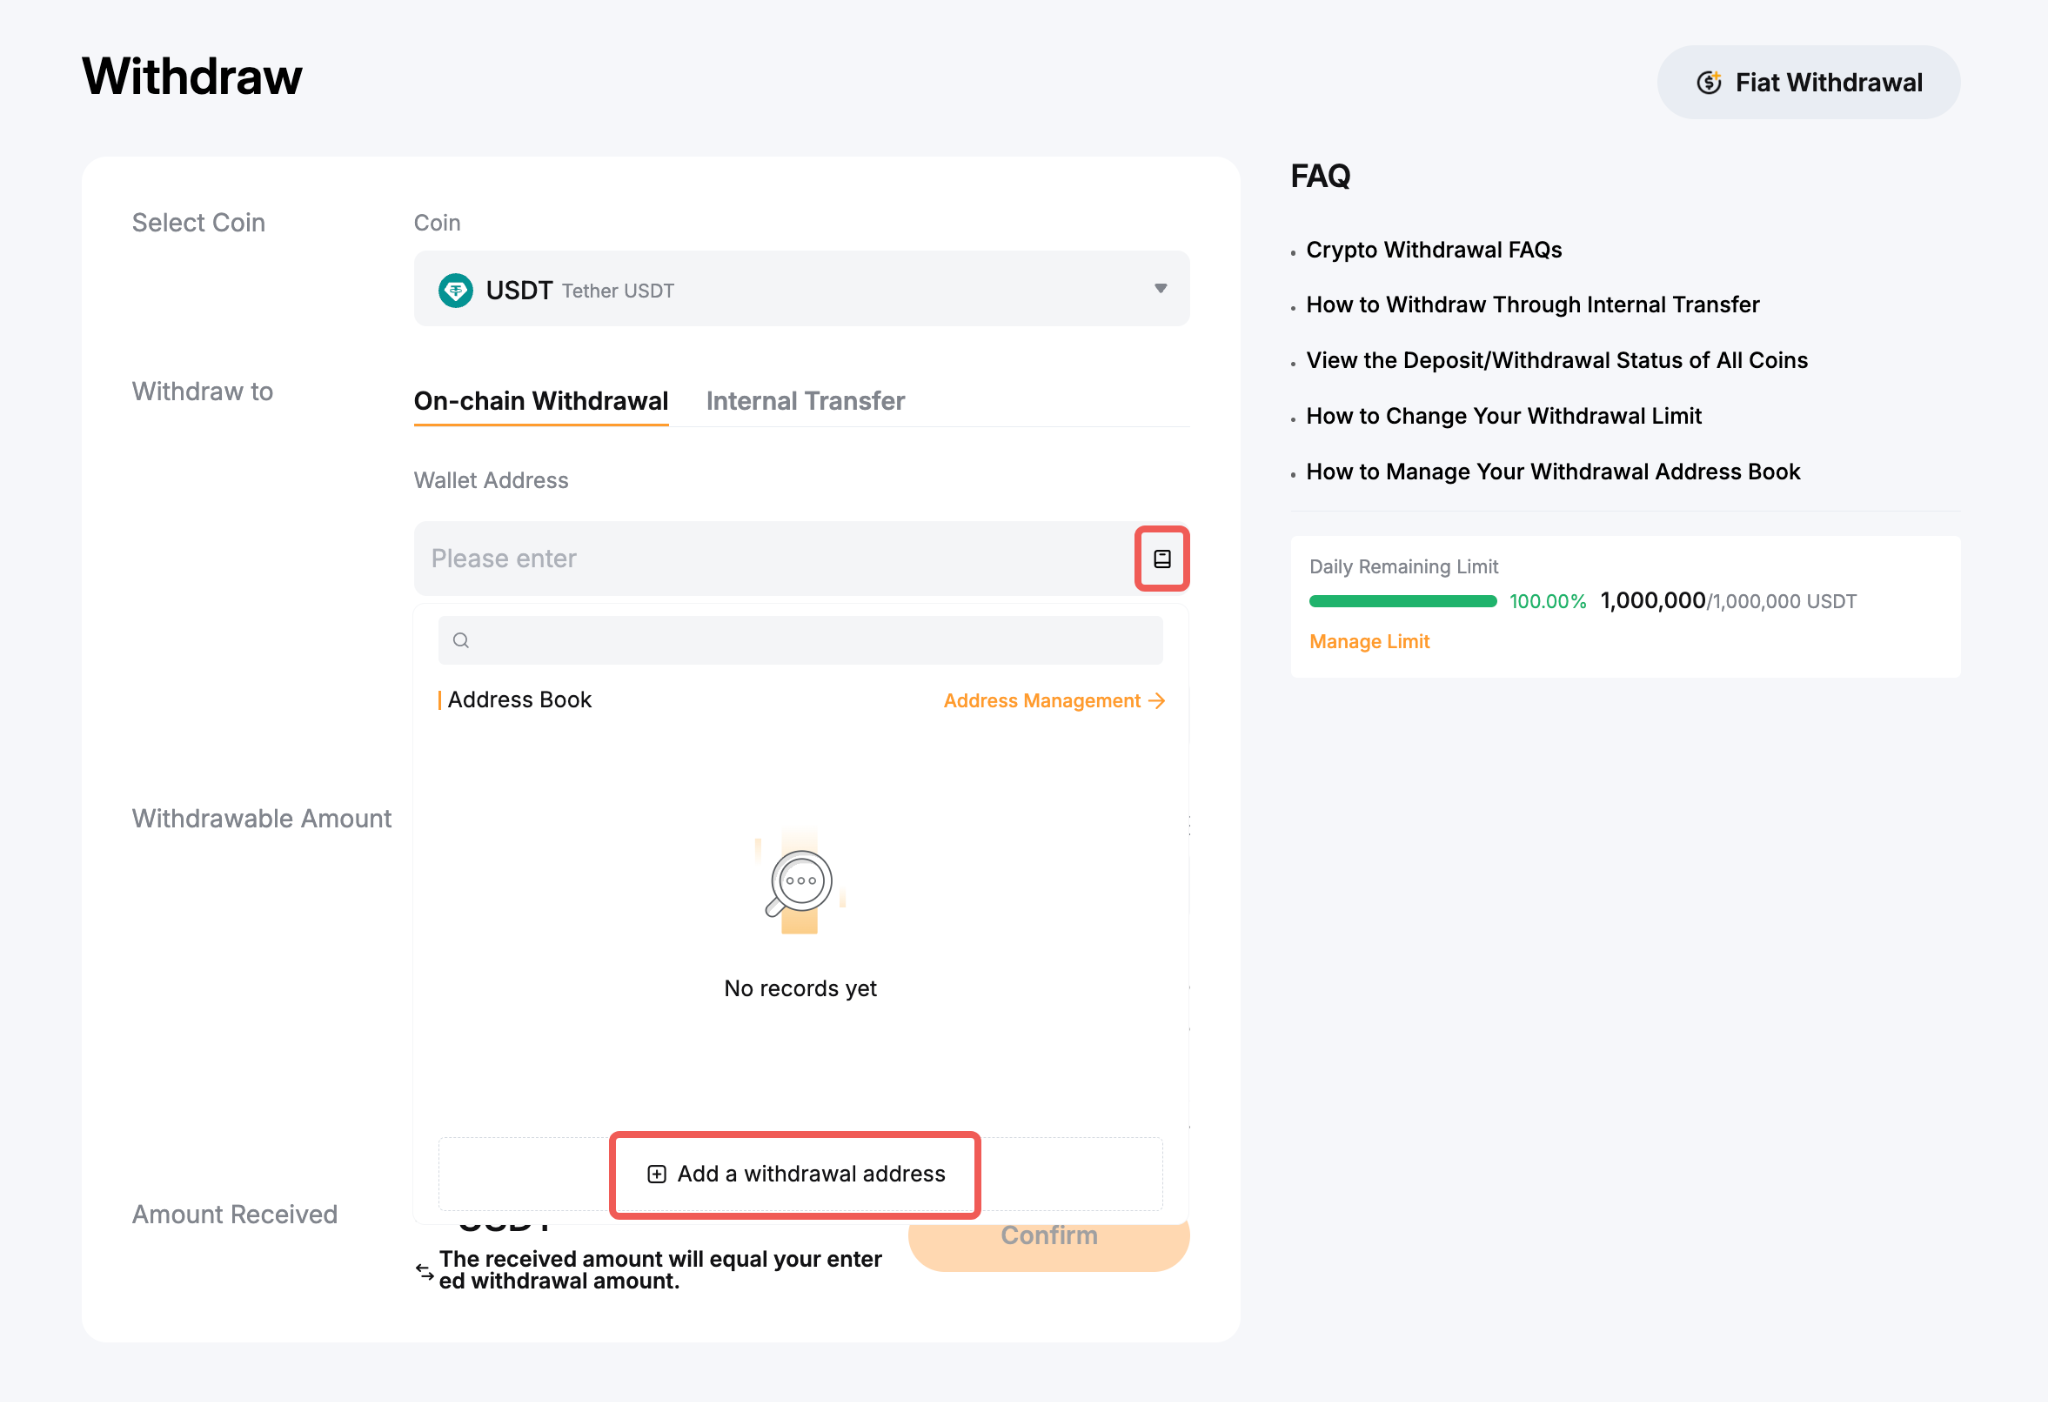
- Select your chosen wallet address among your registered withdrawal wallet addresses, or
- Add a new withdrawal wallet address to your Bybit TR Withdrawal Wallet Address Book.
If you haven’t added a withdrawal address yet and would like to do so, please click on Add to set up your withdrawal address. For more details, please refer to How to Add a Withdrawal Wallet Address.
Step 3: Select the type of chain you prefer and enter the transaction purpose. You will see the withdrawal fee amount for each blockchain network accordingly.
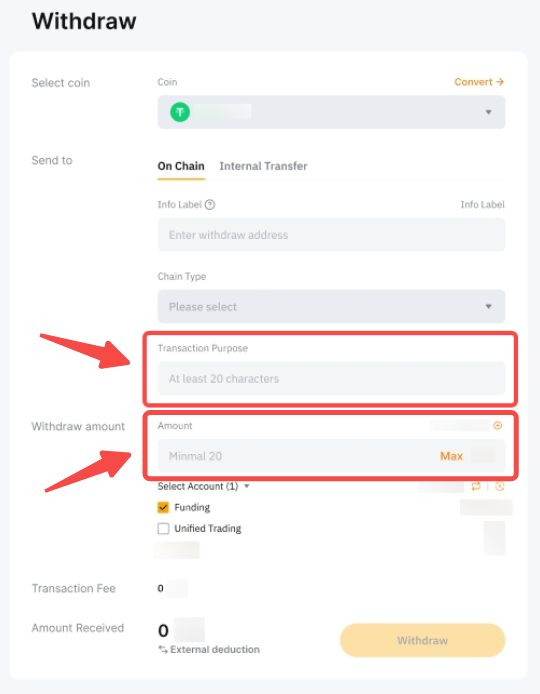
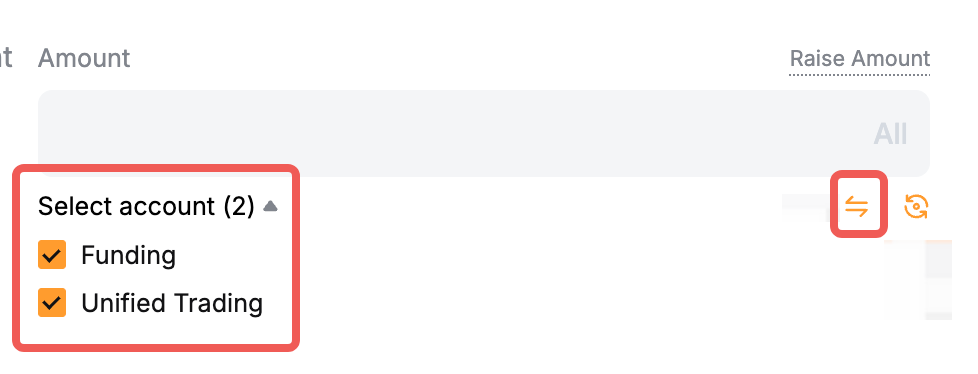
Step 4: Enter the amount you want to withdraw, or click on All to make a full withdrawal. Once the chain type is selected, you’ll also find the minimum withdrawal limit for this particular coin and blockchain network on the right side of the withdrawal window.
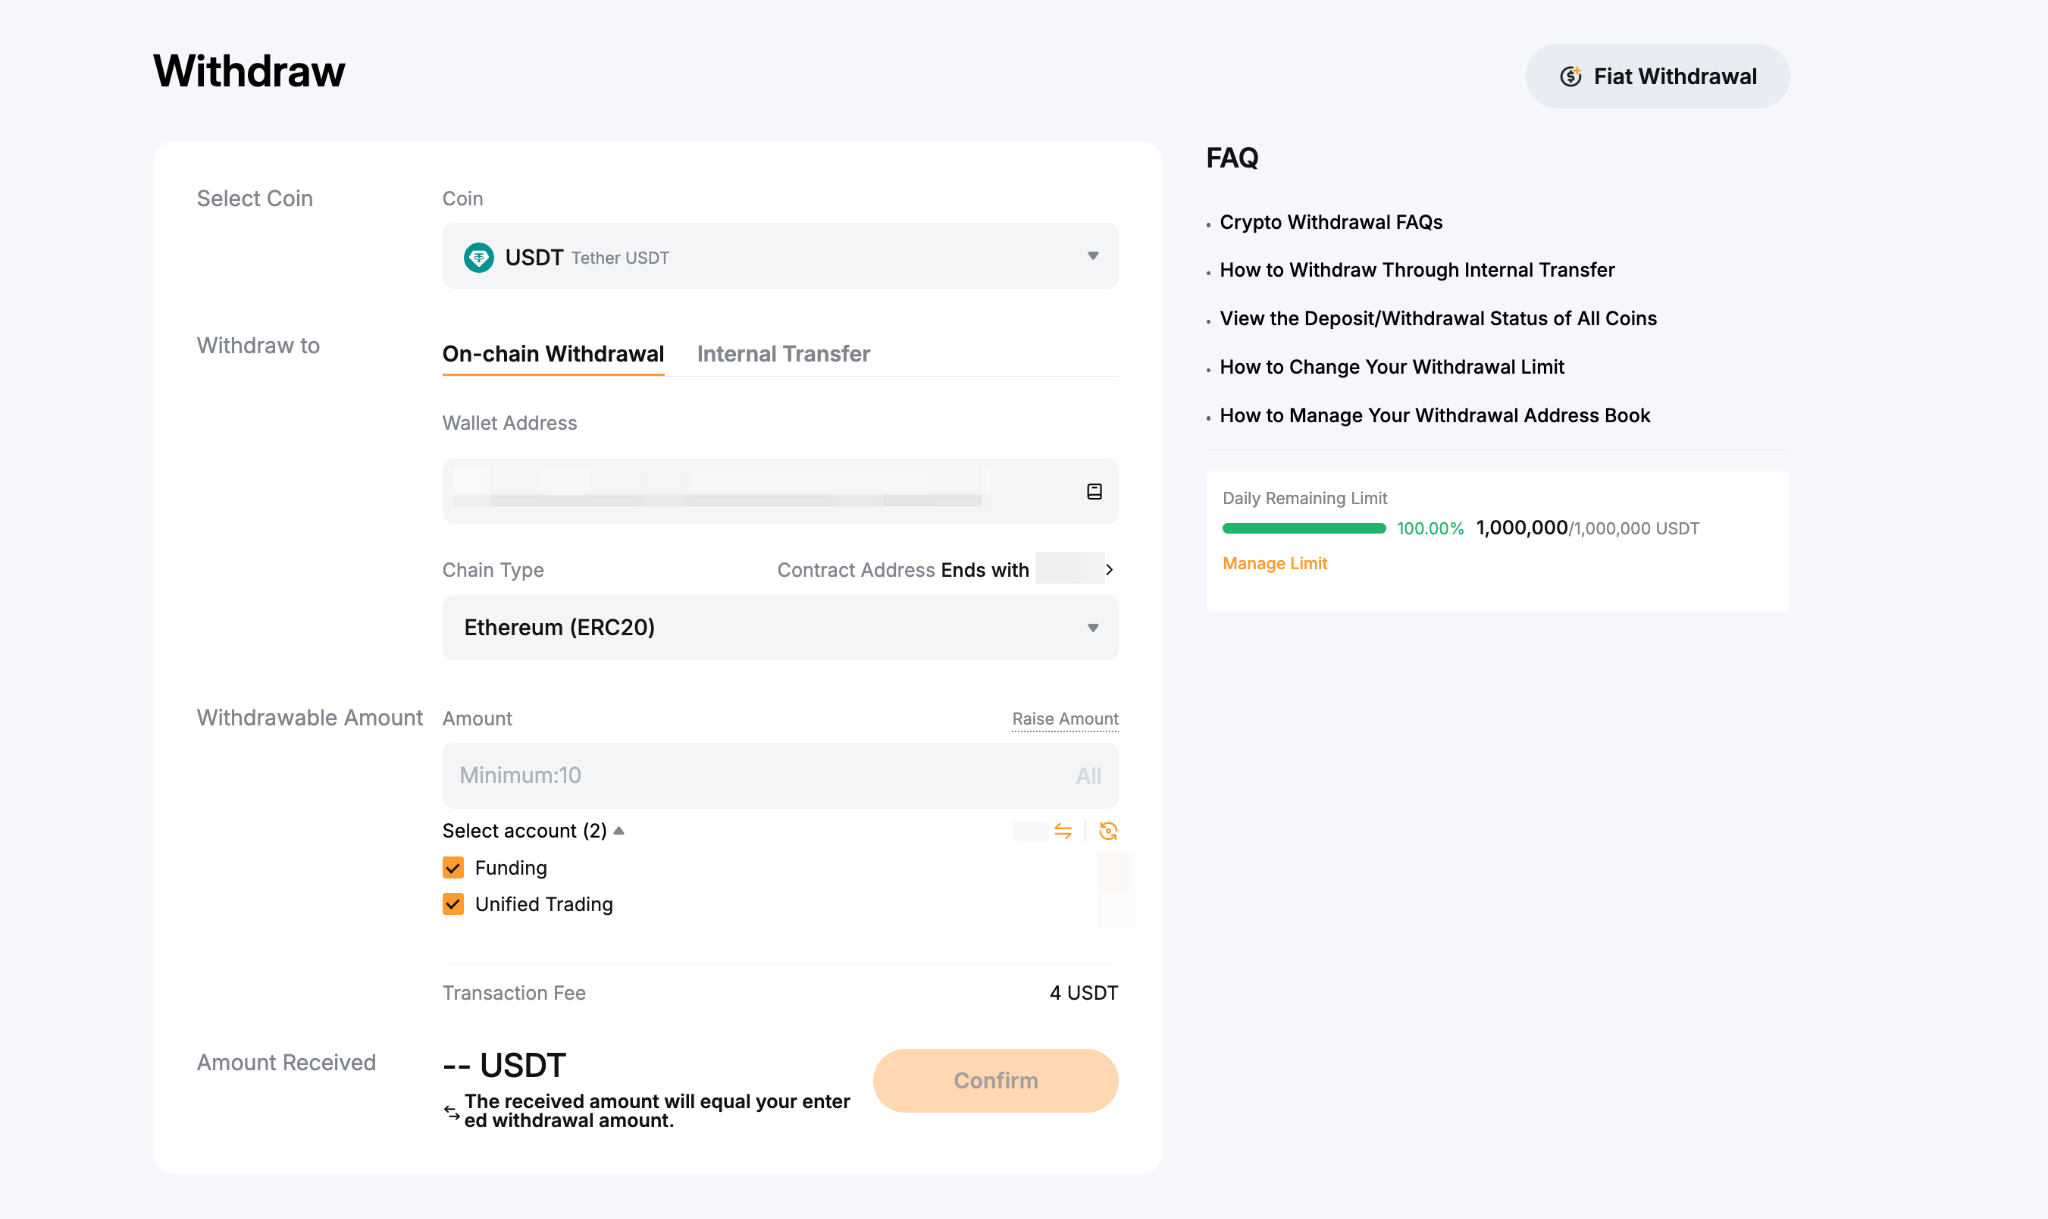
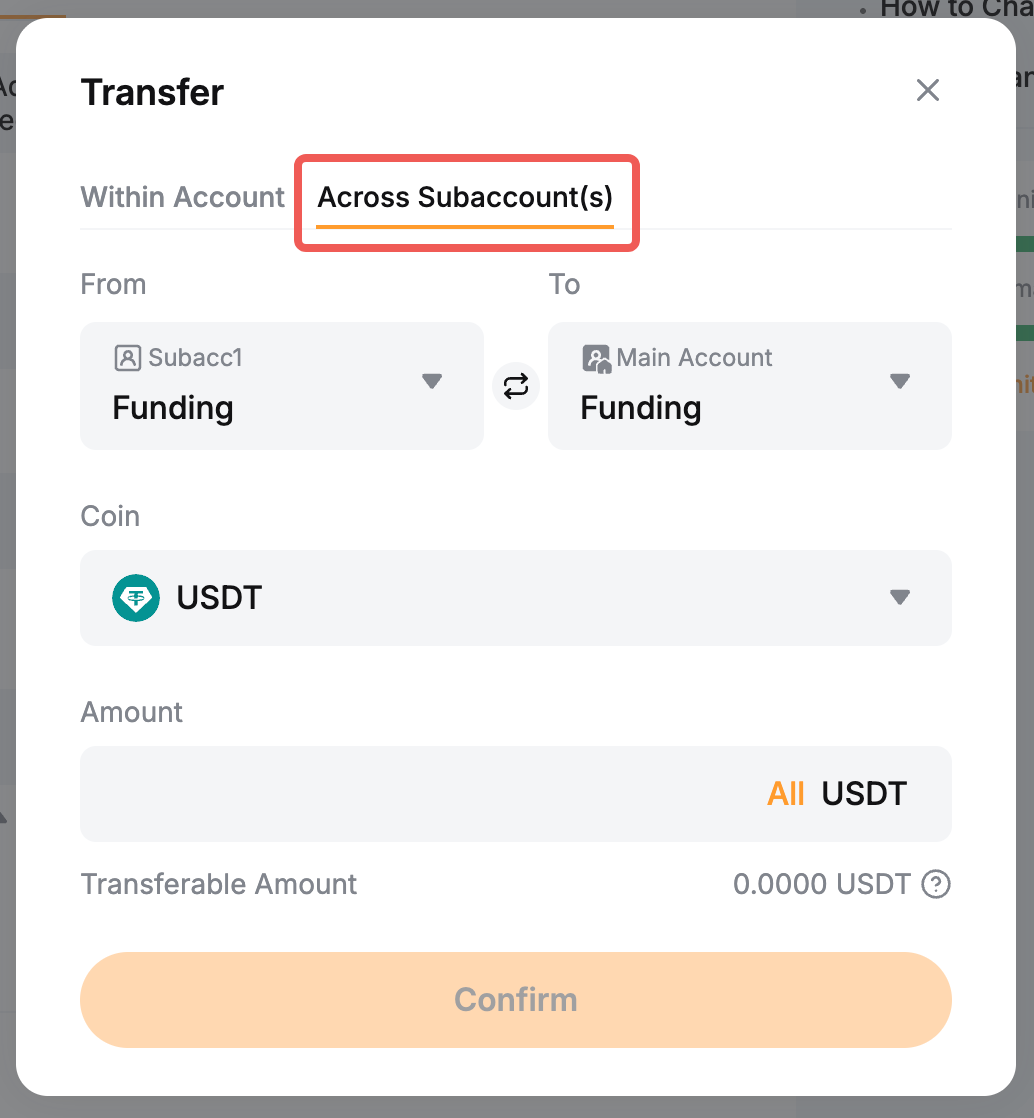
Note: You will be able to select the accounts from which the withdrawal will be performed by ticking the available options. If you have funds in your subaccounts, you can also click on the two-arrow icon to perform the transfer.
Step 5: Complete the security verification by entering Google Authenticator or Email Verification code if your wallet address isn’t verified.
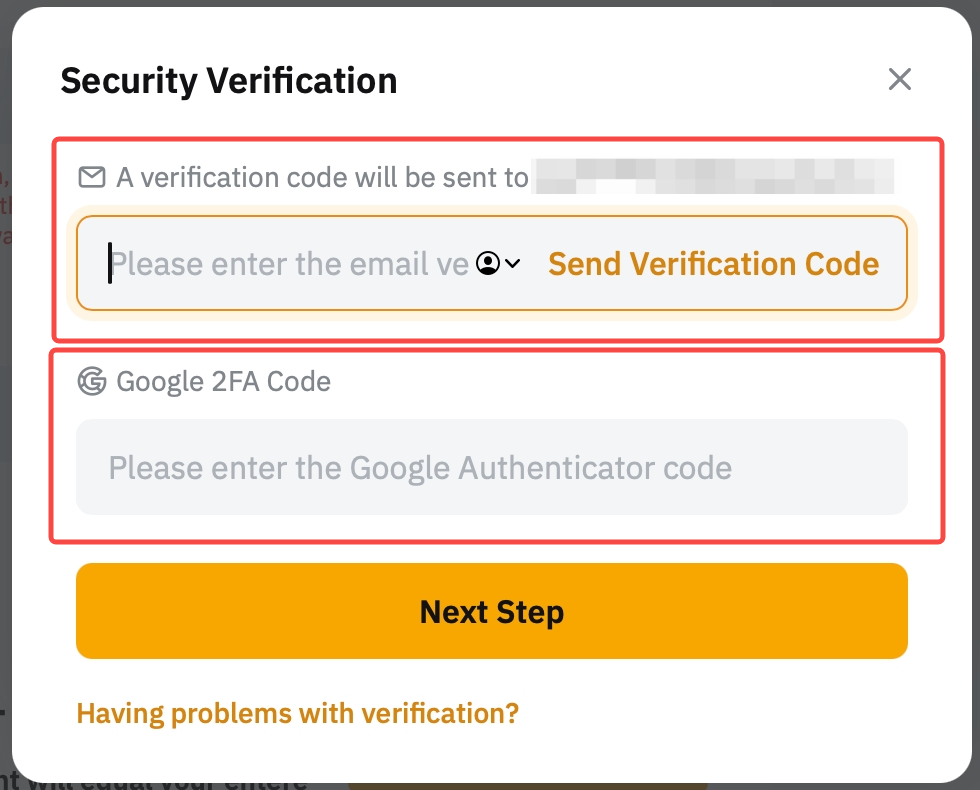
If your address is verified in the Withdrawal Address Whitelist, you won’t need to go through the 2FA verification process. Once done, click on the Confirm button at the bottom of the page.
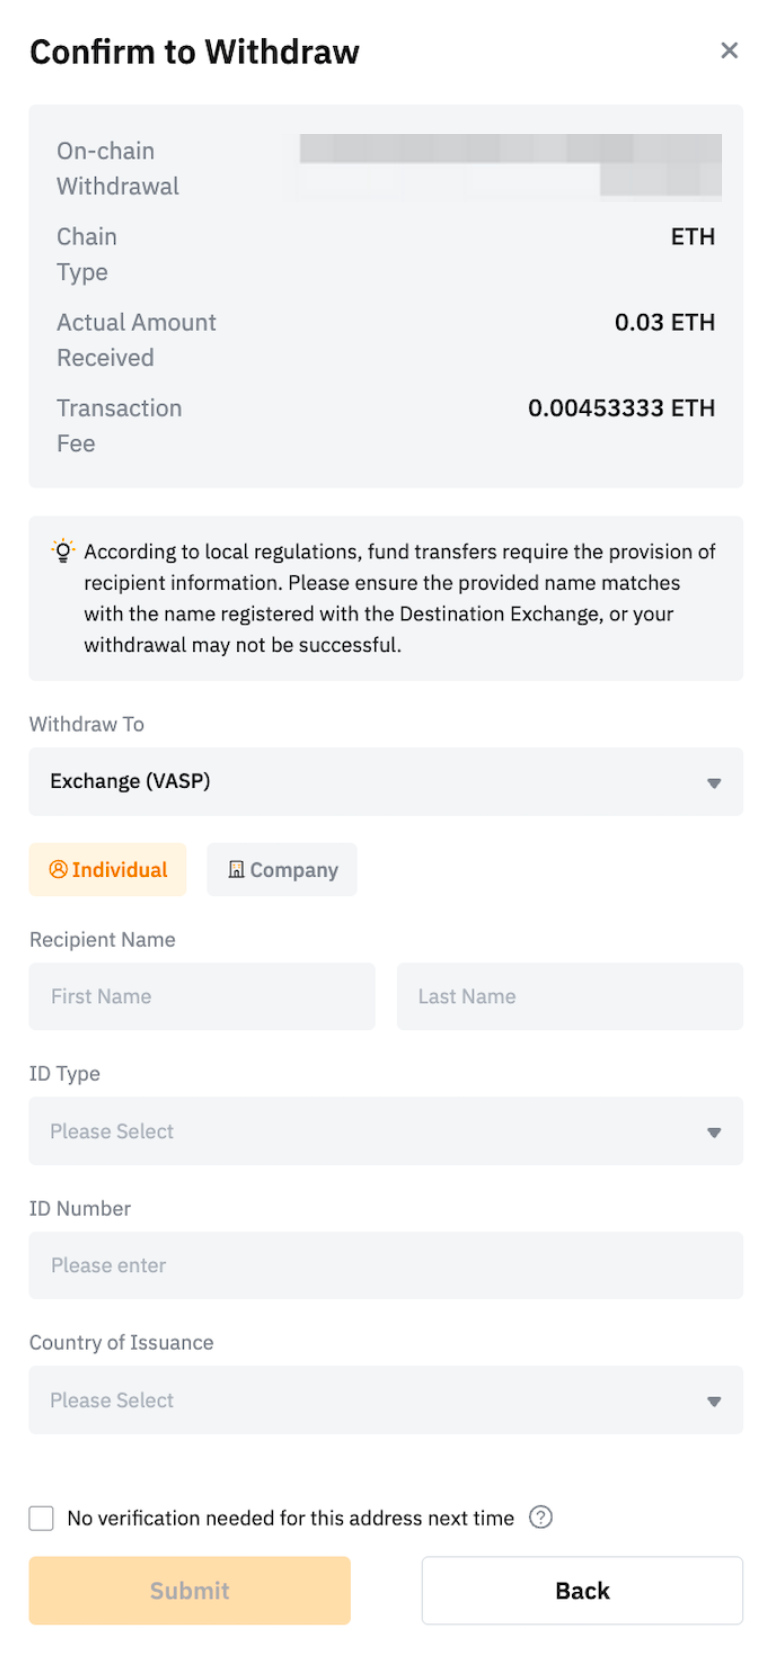
Step 6: It is mandatory to complete the Travel Rule verification once for every withdrawal. Refer to the steps below:
- Select whether the withdrawal is to VASP or Personal Wallet.
- Fill in the Recipient information, such as their name, ID details, and the purpose of the transaction.
- After confirming the information is correct, click Submit.
Note: The provided data must match the name and ID registered on the destination exchange. Otherwise, the withdrawal will fail and be cancelled. For a more detailed guide, please refer to the FAQ — Travel Rule.
Congratulations! You have successfully submitted your withdrawal request! Once the Travel Rule verification is approved, your withdrawal will be processed.
Notes:
— If the email isn’t in your inbox, please check your email’s spam folder. The verification email will only be valid for five minutes.
— The withdrawal may take up to 30 minutes or one hour to process. However, please note that your withdrawal request may be delayed in the event of high network congestion, Travel Rule requirements, or withdrawal cooling periods.